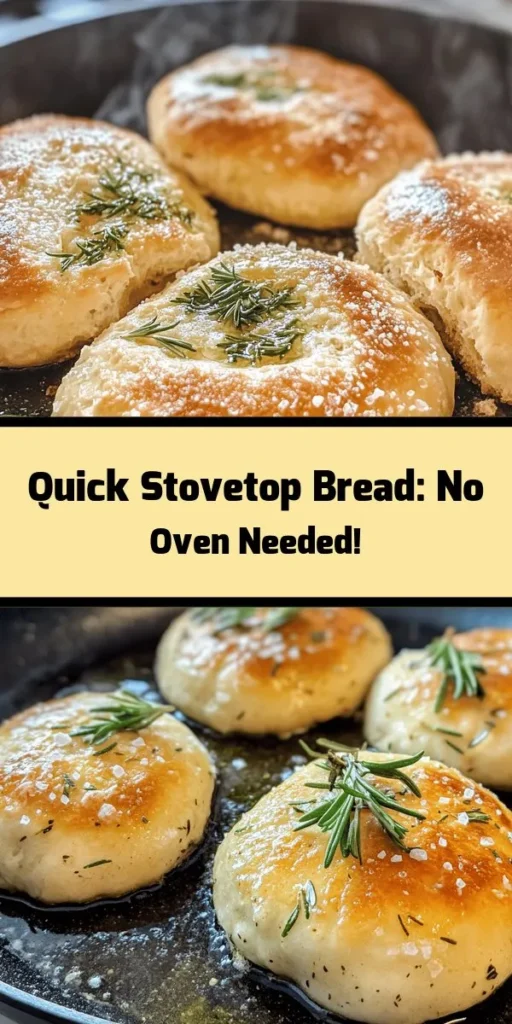
Introduction
Exploring new cooking methods in the kitchen can be an exhilarating experience, particularly when it comes to baking. For those who may find themselves without access to an oven or who simply prefer a quicker alternative, stovetop bread offers a delightful solution. This recipe is perfect for anyone looking to create a soft, fluffy loaf without the hassle of preheating an oven.
In this article, we will dive into the intricacies of crafting a delicious, oven-free bread using simple ingredients and effective techniques. Whether you are a novice cook just starting your culinary journey or a seasoned chef looking for a new challenge, this stovetop delight is sure to impress both your palate and your guests. With the right guidance, you’ll discover that making bread on the stovetop is not only easy but also a fun exploration of flavors and textures.
Understanding the Basics of Stovetop Bread
Stovetop bread is a unique cooking method that allows you to create delicious bread without the traditional oven-baking process. This technique has gained popularity across various cultures, showcasing the simplicity and versatility of bread-making. The concept is rooted in the idea that bread can be cooked effectively on the stovetop, using a skillet or pan, which not only saves time but also provides a different baking experience.
Benefits of Making Bread Without an Oven
One of the standout advantages of stovetop bread is its accessibility. Many people may not have an oven at home, whether due to space constraints in small apartments or simply not wanting to invest in one. Stovetop bread eliminates these barriers, allowing anyone to enjoy homemade bread.
Additionally, cooking bread on the stovetop can be quicker than traditional methods. You can have a fresh loaf ready in under an hour, making it an ideal option for last-minute meal preparations or unexpected guests. The stovetop method also allows for better control over the cooking temperature, resulting in a beautifully browned crust and a soft interior.
The Versatility of Stovetop Bread in Various Cuisines
Another exciting aspect of stovetop bread is its adaptability across different cuisines. From Indian chapatis to Mexican tortillas, many cultures have embraced the stovetop method for their bread-making traditions. This versatility means you can infuse your stovetop bread with flavors and ingredients from around the world, creating a delightful fusion of tastes.
Experimenting with different herbs, spices, and toppings can elevate your stovetop bread to new heights, making it a perfect accompaniment for a variety of meals. Whether you are serving it alongside a hearty stew or enjoying it as a standalone snack with butter, stovetop bread is a versatile addition to any culinary repertoire.
Key Ingredients for Stovetop Delight
Creating stovetop bread requires a few essential ingredients, most of which you likely have in your pantry already. Here’s a quick overview of what you’ll need to get started.
– All-Purpose Flour: This ingredient serves as the foundation of your bread. The versatility of all-purpose flour allows it to be used in various bread recipes, providing a balanced structure and texture.
– Baking Powder: As a leavening agent, baking powder is crucial for achieving a light and fluffy texture in your bread. It works by creating air bubbles in the dough, which expand during cooking, giving the bread its rise.
– Salt and Sugar: These two ingredients play a vital role in balancing the flavor profiles of your bread. While salt enhances the overall taste, sugar adds just the right amount of sweetness, contributing to the bread’s flavor complexity.
– Warm Water and Olive Oil: These ingredients serve as the binding elements in the dough. Warm water helps to activate the baking powder, while olive oil adds moisture and richness.
Optional Ingredients for Enhanced Flavor
To take your stovetop bread to the next level, consider incorporating some optional ingredients. These additions can infuse your bread with delightful aromas and tastes, making it even more enjoyable.
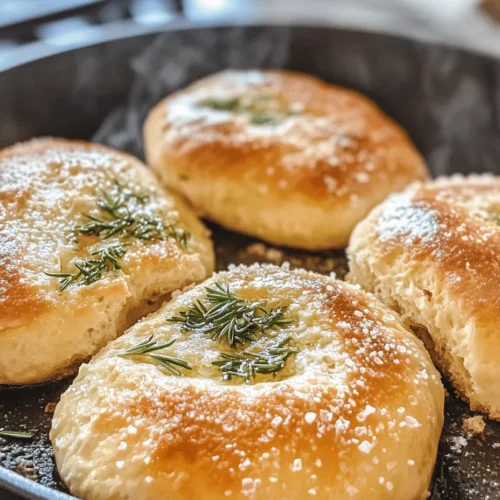
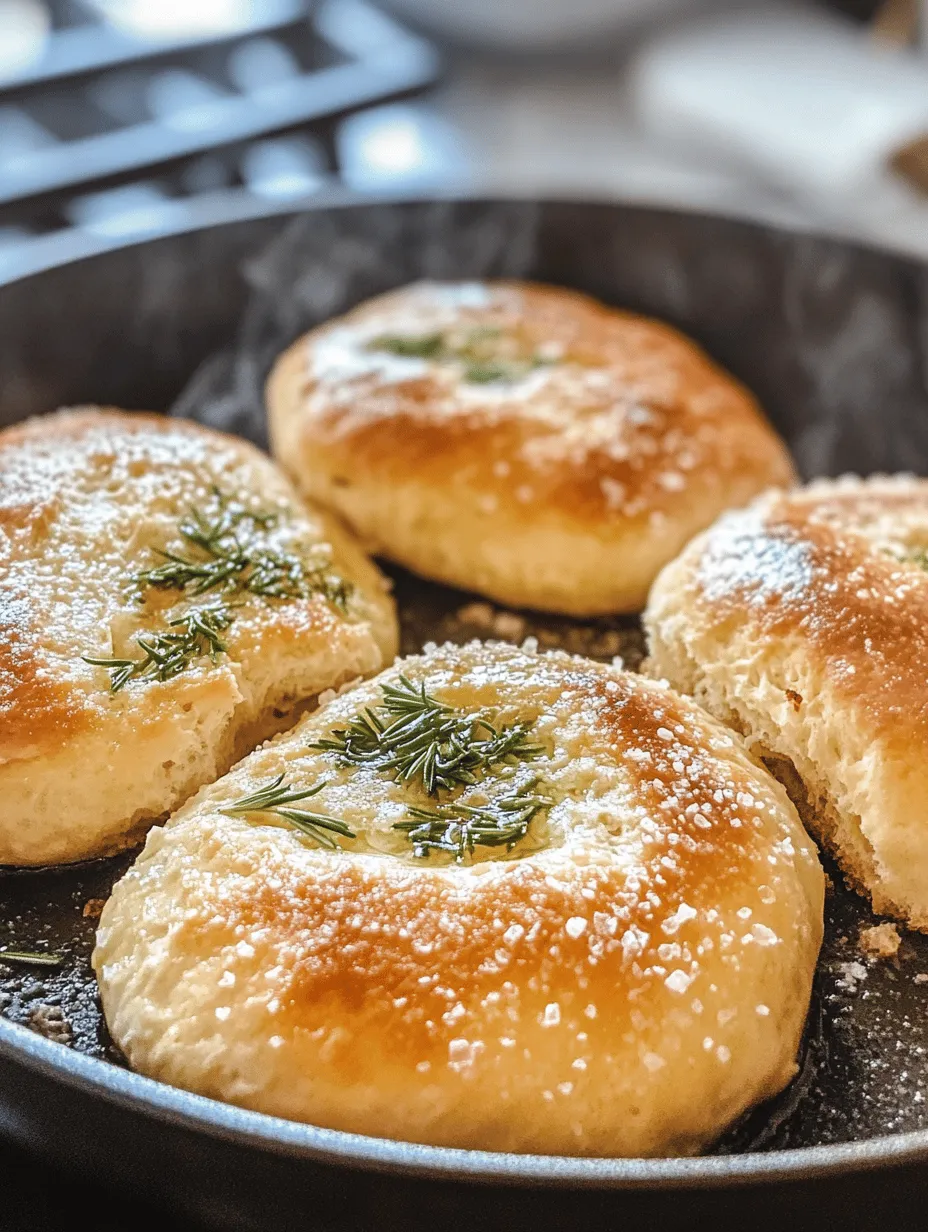
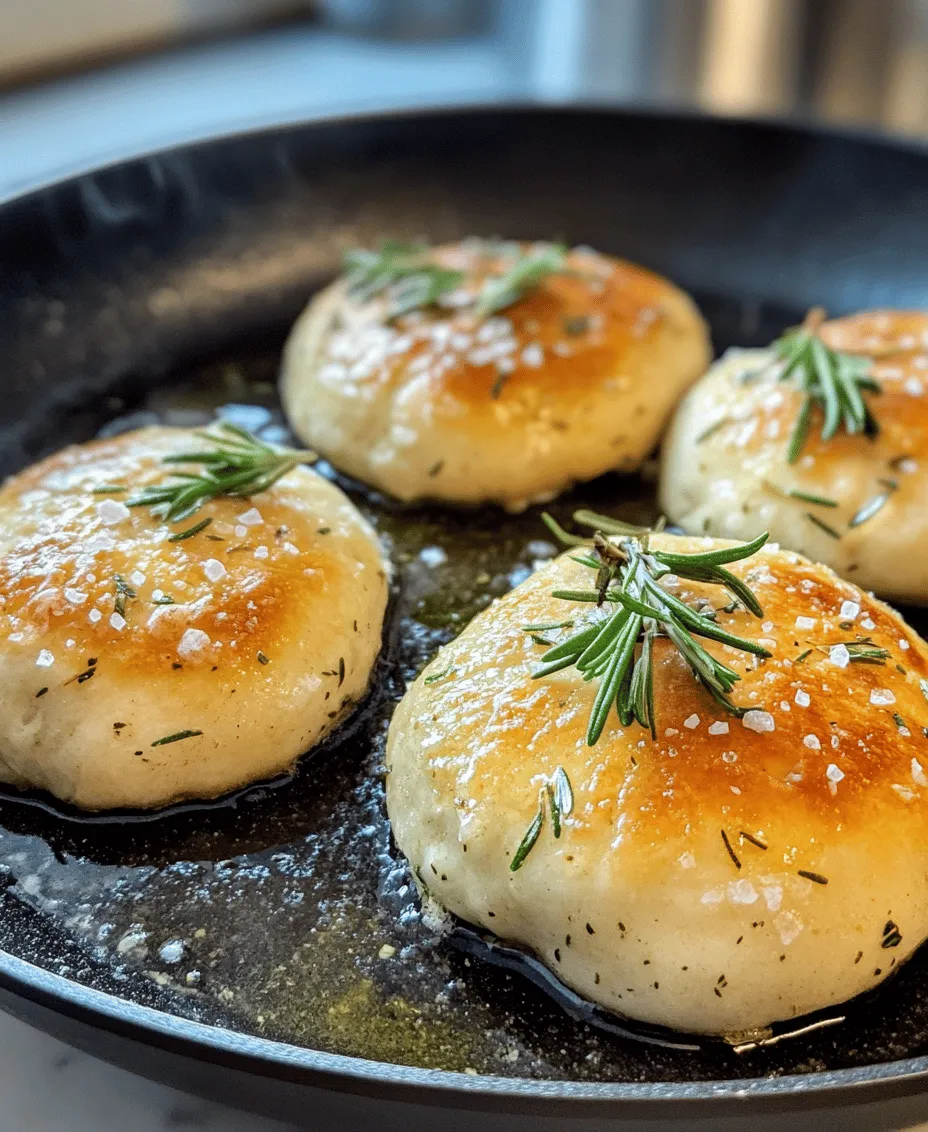
– Herbs: Adding fresh or dried herbs to your dough can significantly enhance its flavor. Consider using rosemary, thyme, or oregano for a savory touch, or even basil for a Mediterranean flair.
– Cheese: Incorporating cheese into your dough adds richness and texture. Cheddar, feta, or mozzarella are excellent choices that can complement the bread’s flavor while providing a satisfying chew.
Step-by-Step Guide to Making Stovetop Bread
Now that we’ve covered the basics and essential ingredients, let’s dive into the step-by-step process of making your stovetop bread. This guide will help you prepare and execute each stage effectively, ensuring a delicious final product.
Preparation and Gathering of Ingredients
Before you begin the cooking process, it’s important to gather all your ingredients and tools. This includes measuring cups, a mixing bowl, a whisk, a skillet, and a spatula. Having everything ready will streamline your cooking experience and make it more enjoyable.
Mixing the Dry Ingredients
Start by mixing your dry ingredients in a large mixing bowl. Combine 2 cups of all-purpose flour, 2 teaspoons of baking powder, 1 teaspoon of salt, and 1 tablespoon of sugar. Use a whisk to ensure that the ingredients are well combined and evenly distributed. Proper whisking is crucial for achieving uniformity in your dough, as it helps to aerate the flour and activate the baking powder.
Creating the Dough
Once your dry ingredients are mixed, it’s time to create the dough. Make a well in the center of the dry mixture and gradually add 3/4 cup of warm water and 2 tablespoons of olive oil. The well method is important here; it allows for a gradual incorporation of the liquid into the dry ingredients, making it easier to mix without creating lumps.
Using a spatula or your hands, begin to mix the ingredients together until they form a cohesive dough. It’s essential to avoid overmixing at this stage; you want to combine the ingredients just until they come together.
Incorporating Optional Ingredients
If you wish to enhance the flavor of your bread, now is the time to incorporate any optional ingredients. For instance, if you’re adding herbs or cheese, fold them into the dough gently, ensuring they are evenly distributed.
Kneading: The Art of Developing Gluten
Kneading is a critical step in developing the gluten structure of your dough. This process gives the bread its elasticity and chewiness. Turn the dough out onto a lightly floured surface and knead it for about 5 to 10 minutes. Use the heels of your hands to push the dough away from you, then fold it back over itself. Rotate the dough a quarter turn and repeat the process.
The goal is to achieve a smooth and elastic dough. If your dough feels too sticky, sprinkle a little extra flour as needed, but be careful not to add too much, as this can affect the final texture of your bread.
Shaping the Dough
After kneading, it’s time to shape your dough. Divide it into equal portions, depending on how large you want your individual breads to be. Shape each portion into a round or oval shape, ensuring that they are evenly sized for consistent cooking.
Proper portioning is essential for even cooking on the stovetop. If your pieces are too large, they may not cook through properly, while smaller portions might cook too quickly and dry out. Aim for a size that is manageable for your skillet and will fit comfortably without overcrowding.
With this foundational knowledge and step-by-step guide, you are well on your way to mastering the art of stovetop bread. In the following sections, we will explore the cooking process, additional tips for perfecting your bread, and address common questions that may arise during your baking adventure. Stay tuned for the complete guide on making this delightful oven-free bread!
Cooking on the Stovetop
When it comes to making stovetop bread, achieving even heat distribution is crucial for cooking your bread evenly. Here are some key tips to ensure that your bread comes out perfectly every time:
1. Use a Heavy-Bottomed Pan: Opt for a cast-iron skillet or a heavy sauté pan. These types of pans retain heat better and distribute it evenly, reducing the chances of hot spots that can burn your bread.
2. Preheat Properly: Before adding the dough to your pan, preheat it on low to medium heat. Allow it sufficient time to reach the desired temperature. This step is essential to ensure that the bread cooks evenly from the bottom up.
3. Adjust the Heat as Needed: Once your bread is in the pan, keep a close eye on the heat level. If you notice that the bread is browning too quickly, reduce the heat. Conversely, if it seems to be cooking too slowly, increase the heat slightly. It may take some trial and error, especially if you’re using a new stovetop or pan.
4. Use a Lid: Covering the pan while cooking helps trap steam, which keeps the bread moist and encourages it to rise. A glass lid can be especially helpful, allowing you to monitor the cooking progress without removing the cover.
5. Rotate the Pan: If your stovetop has uneven heating, consider rotating the pan halfway through the cooking time. This will help ensure that all parts of the bread receive equal heat.
Finishing Touches
To achieve that perfect loaf, consider these techniques for keeping your stovetop bread warm and soft after cooking:
– Wrap in a Clean Kitchen Towel: Once cooked, immediately wrap the bread in a clean kitchen towel. This helps to retain moisture and keep the crust soft.
– Use a Bread Box or Container: If you’re not serving the bread right away, place it in a bread box or a sealed container to maintain its warmth and softness.
– Serve Immediately: While it’s tempting to let bread sit, it’s best served warm. If you must wait, a quick reheat in a covered skillet can help restore some of its original texture.
Flavor Variations and Customizations
One of the best parts about making stovetop bread is the endless possibilities for customizing flavors. Here are some ideas to get you started:
Exploring Different Herbs and Spices
Adding herbs and spices can elevate your bread from simple to extraordinary. Here are some popular choices:
– Rosemary: Fresh or dried rosemary adds a fragrant, earthy flavor. Simply mix it into the dough or sprinkle it on top before cooking.
– Thyme: This herb lends a subtle sweetness and pairs well with many savory dishes. Add it to the dough for a delightful aroma.
– Garlic Powder: For a savory twist, incorporate garlic powder into the dough or mix it with butter to spread on warm slices.
Incorporating Different Cheeses
Cheese can take your stovetop bread to a whole new level. Consider these pairing suggestions:
– Cheddar: Sharp cheddar adds a rich, creamy flavor. Fold shredded cheddar into the dough or sprinkle on top before cooking.
– Feta: Crumbled feta cheese brings a tangy flavor that complements the herbs beautifully. It can be mixed into the dough or served alongside.
– Parmesan: Grated Parmesan adds a nutty richness. Incorporate it into the dough for depth, or sprinkle some on top for a crispy finish.
Sweet Variations
If you’d like to enjoy your stovetop bread as a breakfast or dessert option, consider these sweet variations:
– Adding Fruits: Incorporate dried fruits such as cranberries or raisins into the dough for a natural sweetness.
– Sweet Spices: Experiment with cinnamon or nutmeg for a warm, sweet flavor. These spices can be mixed into the dough or sprinkled on top before cooking.
Serving Suggestions for Stovetop Bread
Once your stovetop bread is ready, the next step is to pair it with delicious accompaniments:
Pairing with Dips and Spreads
Stovetop bread is perfect for dipping! Here are some recommended options:
– Hummus: A creamy hummus dip can add flavor and richness to your freshly baked bread.
– Pesto: This vibrant, herb-infused sauce complements the bread beautifully, especially if you’ve added herbs into the dough.
– Butter: A classic choice, simply spread some butter on warm bread for a comforting treat.
Using the Bread in Meals
Your stovetop bread can also be a versatile meal component. Here are some creative ideas:
– Sandwiches: Use the bread as a base for hearty sandwiches. Layer with your favorite meats, cheeses, and vegetables for a satisfying meal.
– As a Side Dish: Serve the bread alongside soups or salads. It’s perfect for soaking up flavorful broths.
Presentation Tips
To create an appealing dining experience, consider these presentation ideas:
– Serve on a Wooden Board: Presentation can elevate any meal. Use a rustic wooden board to display your bread alongside dips and spreads.
– Garnish with Fresh Herbs: A sprinkle of fresh herbs on top adds a pop of color and freshness.
Nutritional Benefits of Stovetop Bread
Homemade stovetop bread not only offers a delightful taste, but it also has several nutritional benefits compared to store-bought options:
– Control Over Ingredients: When you make your own bread, you have complete control over the ingredients. This means you can choose whole grains, limit additives, and customize flavors.
– Fresher and Healthier: Homemade bread is often fresher than store-bought varieties, which can contain preservatives. This freshness can enhance the taste and nutritional value.
– Whole Ingredients: Using whole ingredients, such as whole wheat flour, seeds, and natural sweeteners, can increase the nutritional profile of your bread, providing fiber and essential nutrients.
Troubleshooting Common Issues
Even the best cooks encounter challenges in the kitchen. Here are some common pitfalls and how to avoid them:
– Bread Not Rising: If your bread doesn’t rise, check the freshness of your baking powder or baking soda. Ensure they are within their expiration date.
– Uneven Cooking: If the bottom of your bread is cooking too quickly while the top remains raw, reduce the heat and cover the pan to allow for more even cooking.
– Burnt Bottom: If you notice the bottom is browning too quickly, lower the heat and consider using a heat diffuser, which can help distribute heat more evenly across the pan.
Adjusting for Different Stovetops and Environments
Cooking times and methods may vary depending on your stovetop type (gas, electric, induction) and the altitude at which you’re cooking. Here are a few adjustments you might consider:
– Gas vs. Electric: Gas stoves tend to heat up faster and may require lower heat settings compared to electric stoves. Adjust your cooking time accordingly.
– High Altitude: If cooking at high altitudes, you may need to increase the cooking time slightly, as bread may take longer to rise and cook through.
Conclusion
Stovetop bread is a versatile and rewarding recipe that allows anyone to enjoy freshly baked bread without the need for an oven. With its simple ingredients and straightforward process, this recipe is perfect for home cooks of all skill levels. As you experiment with flavors and variations, you’ll discover just how satisfying it is to create your own delicious bread right on the stovetop. Embrace the joy of cooking and enjoy a warm slice of homemade bread today!