Introduction
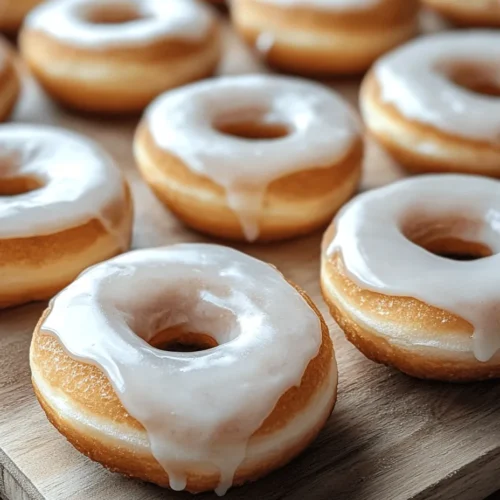
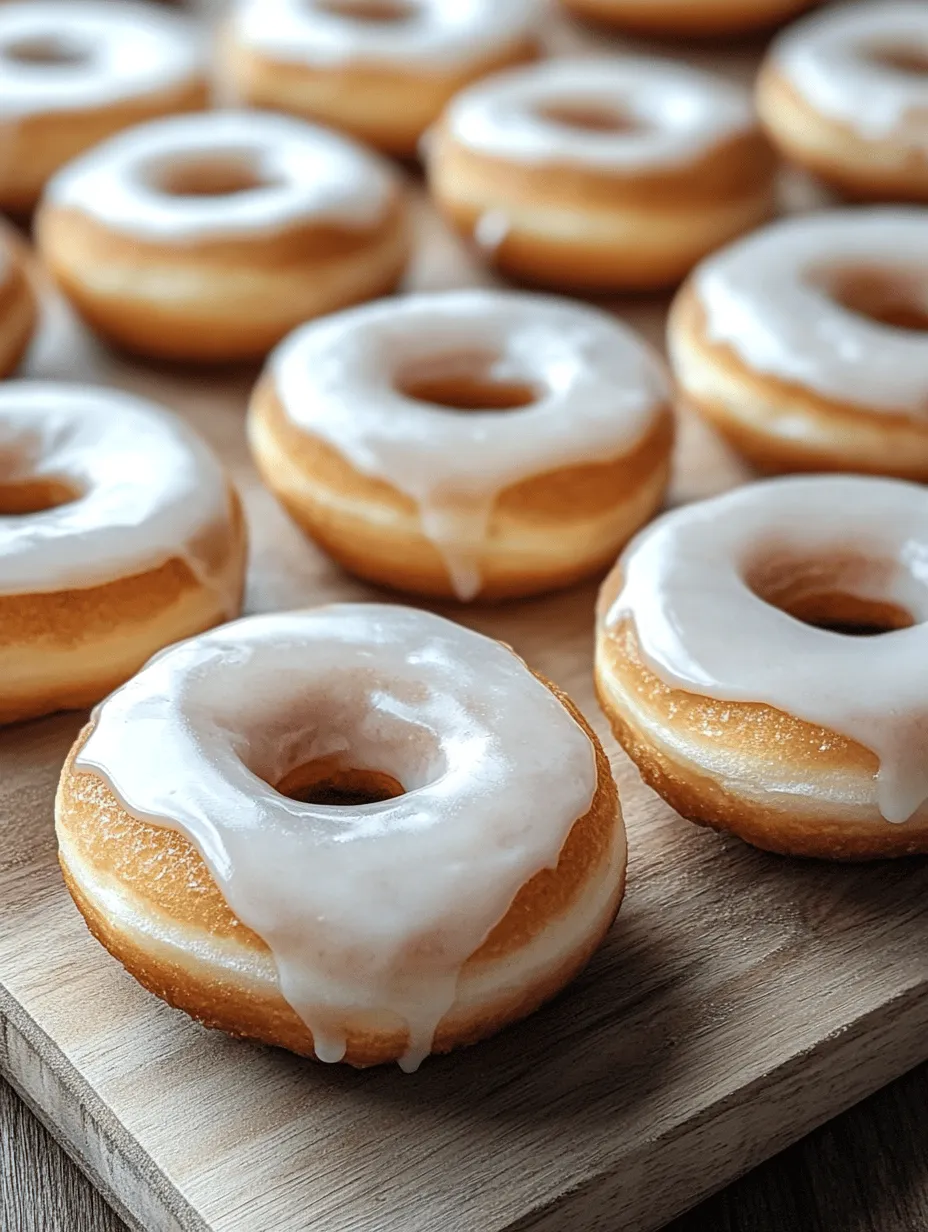
There’s something irresistibly charming about homemade donuts that store-bought pastries simply can’t replicate. The warm, sweet aroma wafting through the kitchen, the soft, pillowy texture as you take your first bite, and the satisfaction of having created something delicious from scratch all contribute to the unique allure of baking donuts at home. Among the myriad of donut recipes available, the “Melt In Your Mouth Glazed Donuts” stands out for its simplicity and the delightful experience it offers.
This recipe combines straightforward techniques with fresh, high-quality ingredients to yield donuts that are remarkably soft and, as the name suggests, melt in your mouth. It’s an ideal choice for both novice bakers and seasoned chefs looking for a delightful homemade treat. Using fresh ingredients ensures that each bite is bursting with flavor, while the simple method makes the process enjoyable and approachable. Whether you’re making these donuts for a special occasion, a family breakfast, or just because you deserve a sweet treat, this recipe is sure to impress.
The Allure of Homemade Donuts
Baking at home is not merely about satisfying a sweet tooth; it’s an experience that engages all the senses. The joy of mixing ingredients, watching dough rise, and the anticipation of tasting the finished product creates a delightful atmosphere in any kitchen. Homemade donuts offer a level of freshness and flavor that is often missing from their store-bought counterparts. When you make donuts from scratch, you have full control over the ingredients, which means you can tailor them to your preferences or dietary needs.
In addition to the superior taste, making donuts at home allows for endless customization. Want to experiment with flavors? You can add different spices, extracts, or even fillings that store-bought options may not provide. The process of creating these sweet treats can also foster family traditions, where generations come together to mix, knead, and glaze donuts. These moments can become cherished memories, passed down through families, creating a sense of connection and nostalgia with each batch.
Ingredient Breakdown
To achieve the perfect donut texture and flavor, it’s essential to understand the role of each ingredient in the “Melt In Your Mouth Glazed Donuts” recipe. Here’s a closer look at what you’ll need:
– All-Purpose Flour: The backbone of the donut, all-purpose flour provides the necessary structure and texture. It offers a balance between strength and tenderness, allowing the donuts to rise beautifully while maintaining a soft crumb.
– Granulated Sugar: This ingredient not only sweetens the donuts but also contributes to their moisture content. The sugar helps create a tender crumb and enhances the overall flavor profile.
– Baking Powder and Baking Soda: These leavening agents are crucial for achieving that light, airy texture that makes donuts so enjoyable. Baking powder works to create lift during the baking process, while baking soda helps with browning and flavor development.
– Salt: Often overlooked, salt plays a vital role in enhancing flavors. It balances the sweetness and brings out the natural flavors of the other ingredients, making the overall taste more pronounced.
– Eggs: Eggs serve as a binding agent in this recipe, providing richness and a velvety texture. They also contribute to the moisture content and help the donuts rise during baking.
– Buttermilk: This ingredient adds moisture and a delightful tang to the donuts. The acidity in buttermilk reacts with baking soda to create a tender crumb while providing a subtle flavor that complements the sweetness.
– Unsalted Butter: Butter enriches the donut batter with its rich flavor. Using unsalted butter allows you to control the salt content of your recipe better, ensuring the perfect balance of flavors.
– Vanilla Extract: A staple in many sweet recipes, vanilla extract adds depth and a warm aroma to the donuts, enhancing their overall appeal.
– Nutmeg (optional): This warm spice is often included in donut recipes for a hint of flavor complexity. While not essential, nutmeg can add a nostalgic touch reminiscent of classic bakery donuts.
Understanding the role of each ingredient not only enhances your baking skills but also empowers you to make adjustments based on personal taste or dietary restrictions.
Preparing the Dough
Now that you have a solid foundation of the ingredients, it’s time to dive into the preparation of the donut batter. This straightforward process ensures that you achieve the perfect consistency and flavor for your donuts.
Step 1: Gather Your Ingredients
Before you begin, gather all the ingredients and tools you’ll need. This includes measuring cups, a mixing bowl, a whisk, a spatula, and a donut pan if you plan to bake them. Having everything ready will streamline your baking process and help you avoid any last-minute scrambles.
Step 2: Preheat Your Oven
Preheat your oven to 375°F (190°C). This ensures that your donuts will bake evenly and rise properly, giving them that desirable fluffy texture.
Step 3: Mix the Dry Ingredients
In a large mixing bowl, whisk together the all-purpose flour, granulated sugar, baking powder, baking soda, salt, and nutmeg (if using). Mixing these dry ingredients first ensures that the leavening agents are evenly distributed throughout the flour, which is key to achieving uniform donuts.
Step 4: Combine the Wet Ingredients
In a separate bowl, whisk together the eggs, buttermilk, melted unsalted butter, and vanilla extract until smooth. Ensure that your butter is not too hot, as this could cook the eggs when combined. The mixture should be well combined and creamy.
Step 5: Create the Donut Batter
Pour the wet ingredients into the bowl with the dry ingredients. Using a spatula, gently fold the mixture together until just combined. Be careful not to overmix; a few lumps are perfectly acceptable. Overmixing can lead to tough donuts, which is something we want to avoid.
Step 6: Fill the Donut Pan
Once the batter is ready, it’s time to transfer it to the donut pan. You can use a piping bag for a mess-free transfer or simply spoon the batter into each cavity. Fill each donut mold about halfway to allow room for the donuts to rise without overflowing.
Step 7: Bake
Place the filled donut pan in the preheated oven and bake for 10-12 minutes, or until the donuts are golden brown and a toothpick inserted into the center comes out clean. Keep an eye on them as baking times can vary depending on your oven.
Step 8: Cool
Once baked, remove the donuts from the oven and let them cool in the pan for a few minutes before transferring them to a wire rack to cool completely. This cooling step is crucial, as it helps the donuts set properly and prevents them from becoming soggy.
Now that you’ve prepared the dough, you’re well on your way to creating a batch of “Melt In Your Mouth Glazed Donuts.” Stay tuned for the next part, where we will delve into the glazing process and share some tips to perfect your homemade donuts!
Perfecting Your Melt In Your Mouth Glazed Donuts
Preheating the Oven and Preparing the Donut Pan
Before diving into the donut-making process, it’s crucial to preheat your oven to 375°F (190°C). This step ensures that your donuts rise properly and have a beautiful golden-brown color. While waiting for the oven to reach the desired temperature, prepare your donut pan. Grease it generously with non-stick cooking spray or butter to prevent the donuts from sticking. For an added layer of flavor, you can also dust the pan with a bit of flour after greasing. This simple preparation can make a significant difference in the final presentation of your donuts.
Mixing Dry Ingredients: Tips for Ensuring an Even Blend
In a large mixing bowl, combine your dry ingredients: all-purpose flour, baking powder, baking soda, and salt. For the best results, whisk these ingredients together thoroughly. This step is essential for ensuring that the baking powder and baking soda are evenly distributed throughout the flour, which helps the donuts rise uniformly. A well-blended dry mixture will lead to an even texture and prevent any clumps from forming in your batter. To elevate the flavor, consider sifting the dry ingredients before mixing; this also aerates the flour, resulting in lighter donuts.
Combining Wet Ingredients: Techniques for Smooth Mixtures
Next, it’s time to focus on the wet ingredients. In another bowl, whisk together your eggs, granulated sugar, milk, melted butter, and vanilla extract. For a smoother mixture, start by beating the eggs and sugar together until they are pale and fluffy; this incorporates air, which contributes to the lightness of the donuts. Gradually add in the melted butter and milk while continuing to whisk, ensuring that everything is well combined. The key here is to mix until just incorporated; overmixing can lead to dense donuts. The final batter should be smooth and slightly thick, with no visible lumps.
Importance of Not Overmixing the Batter and Achieving the Right Consistency
When combining the wet and dry ingredients, pour the wet mixture into the bowl of dry ingredients. Using a spatula, gently fold the two mixtures together. This method is crucial for maintaining the light texture of your donuts. Remember, the goal is to combine the ingredients without overmixing; a few small lumps are perfectly fine. Overmixing can develop gluten in the flour, leading to tough donuts instead of the tender, melt-in-your-mouth texture we desire. Aim for a thick but pourable batter that holds its shape when dropped from a spoon.
Filling and Baking the Donuts
Proper Techniques for Filling the Donut Pan
Now that your batter is ready, it’s time to fill the donut pan. This step can make or break the appearance of your donuts. Using either a piping bag or a ziplock bag, fill the bag with your batter. If using a ziplock bag, snip off one of the corners for better control. When filling the molds, be careful not to overfill; aim to fill each cavity about two-thirds full. Overfilling can cause the batter to spill over, resulting in misshapen donuts.
Using Piping Bags vs. Ziploc Bags for Ease
While a piping bag may provide a more professional touch, a ziplock bag is a convenient alternative that many home bakers prefer. Both options allow for better control compared to using a spoon, which can lead to messy results. If you opt for a piping bag, consider using a round tip for even distribution. This versatility allows you to create perfectly shaped donuts every time.
Guidelines for Filling the Molds to Achieve Optimal Donut Shape
To achieve that classic donut shape, ensure that the batter is evenly distributed within the molds. After filling, gently tap the pan on the countertop; this helps remove any air bubbles and ensures that the batter settles evenly. The result will be beautifully rounded donuts that rise perfectly while baking.
Baking Tips: Optimal Baking Times and How to Check for Doneness
Place the filled donut pan in the preheated oven and bake for 10 to 12 minutes. Baking time may vary slightly depending on your oven’s accuracy, so keep an eye on them. To check for doneness, insert a toothpick into the center of a donut. If it comes out clean or with a few moist crumbs, your donuts are ready to be taken out of the oven. Avoid overbaking, as this can dry out the donuts.
Importance of Cooling Before Glazing
Once baked, allow the donuts to cool in the pan for about 5 minutes before transferring them to a wire rack. This cooling period is crucial, as glazing warm donuts can cause the glaze to become runny and slide off. Letting them cool completely ensures that the glaze adheres better, resulting in a glossy finish.
Creating the Perfect Glaze
Ingredients and Method for the Glaze
While your donuts cool, let’s prepare the glaze. In a medium bowl, combine powdered sugar, milk, and vanilla extract. Start with one tablespoon of milk and gradually add more until you reach your desired consistency. The glaze should be thick enough to coat the back of a spoon but thin enough to dip the donuts easily.
Adjusting Thickness: How to Achieve the Desired Consistency
If your glaze is too thick, add a teaspoon of milk at a time until it reaches the perfect consistency. Conversely, if it’s too thin, add more powdered sugar until thickened. This flexibility allows you to customize your glaze to your liking, making it perfect for dipping or drizzling.
Tips for Whisking to a Smooth and Glossy Finish
Use a whisk to thoroughly mix the glaze until it is smooth and free of lumps. A well-prepared glaze will not only enhance the flavor of your donuts but also provide a beautiful aesthetic. The glossy finish is a hallmark of a perfect donut glaze, giving your treats a professional appearance.
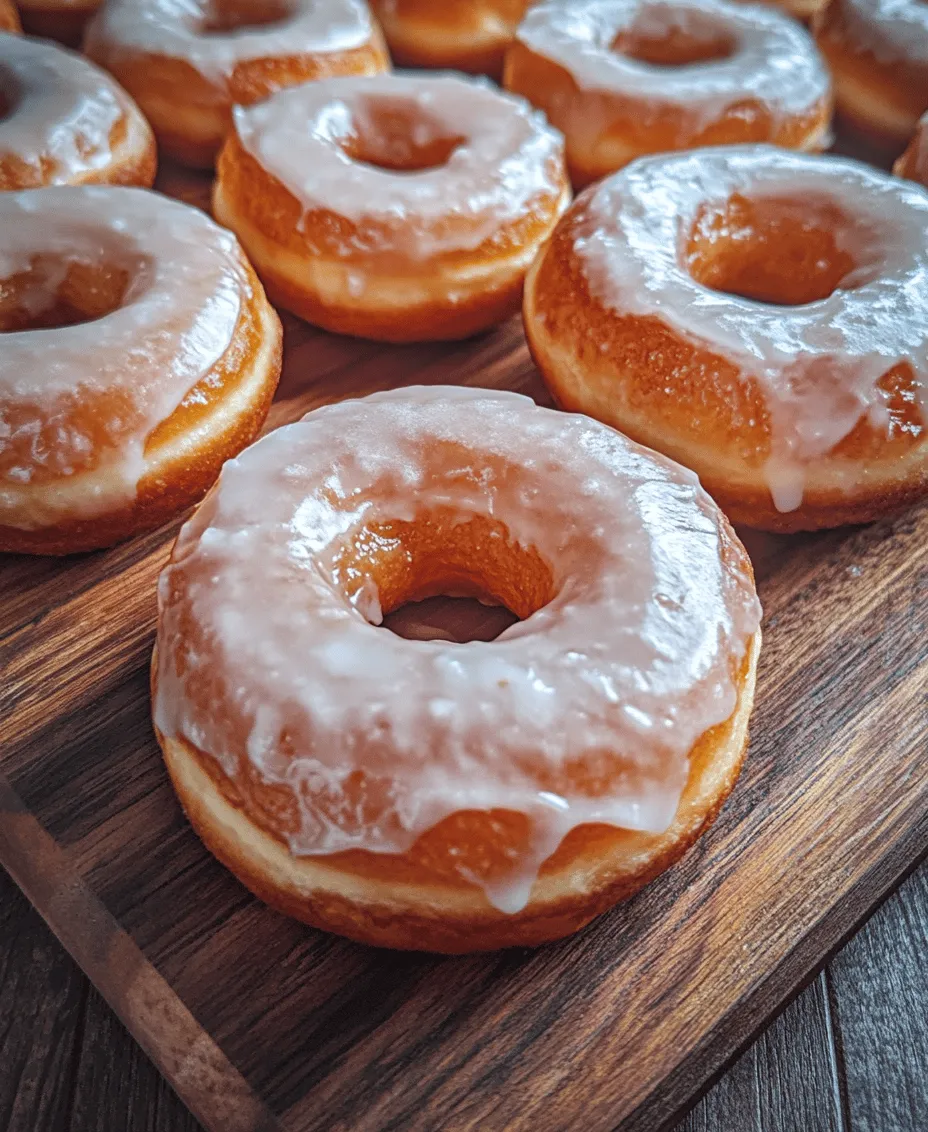
The Art of Glazing: Techniques for Dipping and Coating Donuts
To glaze your donuts, dip the top half of each donut into the glaze, allowing any excess to drip off. For a thicker coating, you can dip them twice, allowing the first layer to set for a few minutes before repeating the process. Alternatively, you can drizzle the glaze over the donuts for a more artistic presentation. Don’t forget to sprinkle toppings like colorful sprinkles, chopped nuts, or shredded coconut immediately after glazing, as the glaze needs to be wet for them to stick.
Serving Suggestions
Pairing Ideas: Beverages That Complement the Donuts
Melt In Your Mouth Glazed Donuts are best enjoyed fresh, paired with your favorite beverage. Coffee is a classic choice, as its rich flavor complements the sweetness of the donuts perfectly. For a lighter option, consider pairing them with herbal teas or a refreshing glass of milk. These combinations can enhance the overall enjoyment of your homemade treats.
Presentation Tips for a Delightful Serving Experience
When serving your donuts, consider arranging them on a decorative platter or cake stand. This not only elevates the visual appeal but also makes them a beautiful centerpiece for any gathering. Dusting the platter with a light sprinkle of powdered sugar or cocoa adds an elegant touch.
Storage Suggestions for Keeping Donuts Fresh
If you have leftover donuts (which is rare!), store them in an airtight container at room temperature for up to two days. For longer storage, consider freezing them. Place the cooled donuts in a single layer on a baking sheet and freeze until solid. Then transfer them to a freezer-safe container. When you’re ready to enjoy, simply thaw them at room temperature and re-glaze if desired.
Conclusion
Making Melt In Your Mouth Glazed Donuts is not just about the end result; it’s about the joy of creating something delicious from scratch. The process of combining ingredients, watching them rise in the oven, and finally glazing them to perfection can be incredibly satisfying. These donuts are perfect for breakfast, as a snack, or as a sweet treat to share with loved ones. We encourage you to try this recipe and enjoy the delightful results of your homemade creations. There’s nothing quite like the satisfaction of pulling a tray of warm, perfectly glazed donuts from your own oven, ready to be savored with family and friends. Indulge in the homemade bliss and make memories as sweet as the treats themselves!