Introduction
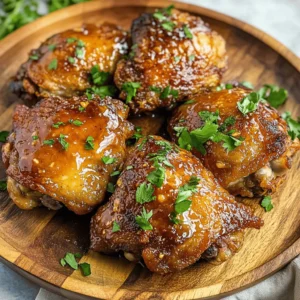
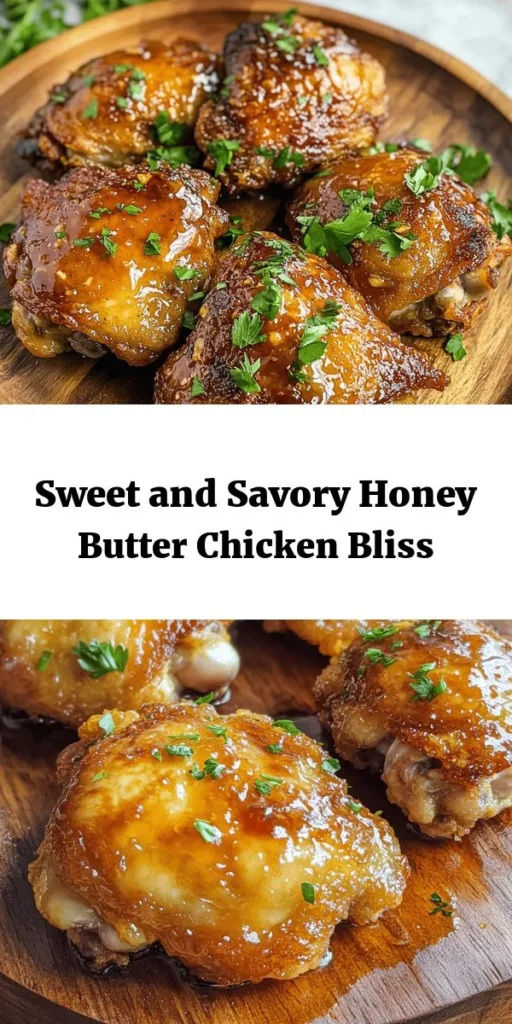
Honey Butter Chicken is a dish that encapsulates the delightful fusion of sweet and savory flavors that tantalize the taste buds. A comforting meal cherished by many, Honey Butter Chicken has quickly gained popularity in home kitchens and restaurants alike. Its appeal lies not only in its deliciousness but also in its simplicity; it is an accessible recipe that can transform a weeknight dinner into something special. With tender, juicy chicken thighs coated in a crispy, flavorful batter and drizzled with a luscious honey butter sauce, this dish is sure to impress family and friends during gatherings or casual dinners.
The beauty of Honey Butter Chicken is that it brings a unique combination of flavors to the table—sweetness from honey perfectly balanced with savory elements. It’s a versatile recipe that can easily be adapted to suit various tastes and dietary preferences, making it an excellent choice for anyone looking to explore new culinary delights. This article will guide you through the history of Honey Butter Chicken, explain its flavor profile, and detail the ingredients you’ll need to create this mouthwatering dish. Additionally, we will cover the preparation steps to ensure your chicken is crispy, tender, and infused with flavor.
Understanding Honey Butter Chicken
A Brief History of Honey Butter Chicken
Honey Butter Chicken has its roots in Southern cuisine, where deep-frying is a beloved cooking technique for creating flavorful, crispy dishes. While the exact origin of this dish is not well-documented, it is believed to have been inspired by the classic Southern fried chicken, which has been a staple in American homes for generations. The addition of honey and butter elevates the traditional fried chicken, giving it a sweet glaze that complements the savory notes of the seasoned crust.
In recent years, Honey Butter Chicken has become a popular item on menus across the United States, especially in fast-casual dining establishments. Its rise in popularity can be attributed to the growing trend of fusion cuisine, where traditional dishes are reinvented with innovative flavors and ingredients. As people seek comfort food that satisfies both sweet and savory cravings, Honey Butter Chicken has secured its place as a beloved favorite.
The Flavor Profile: A Perfect Balance of Sweet and Savory
One of the most appealing aspects of Honey Butter Chicken is its harmonious flavor profile. The dish is characterized by a crispy exterior that is both savory and subtly sweet, thanks to the honey glaze. The balance of flavors is achieved through a combination of key ingredients that work together to create a satisfying culinary experience.
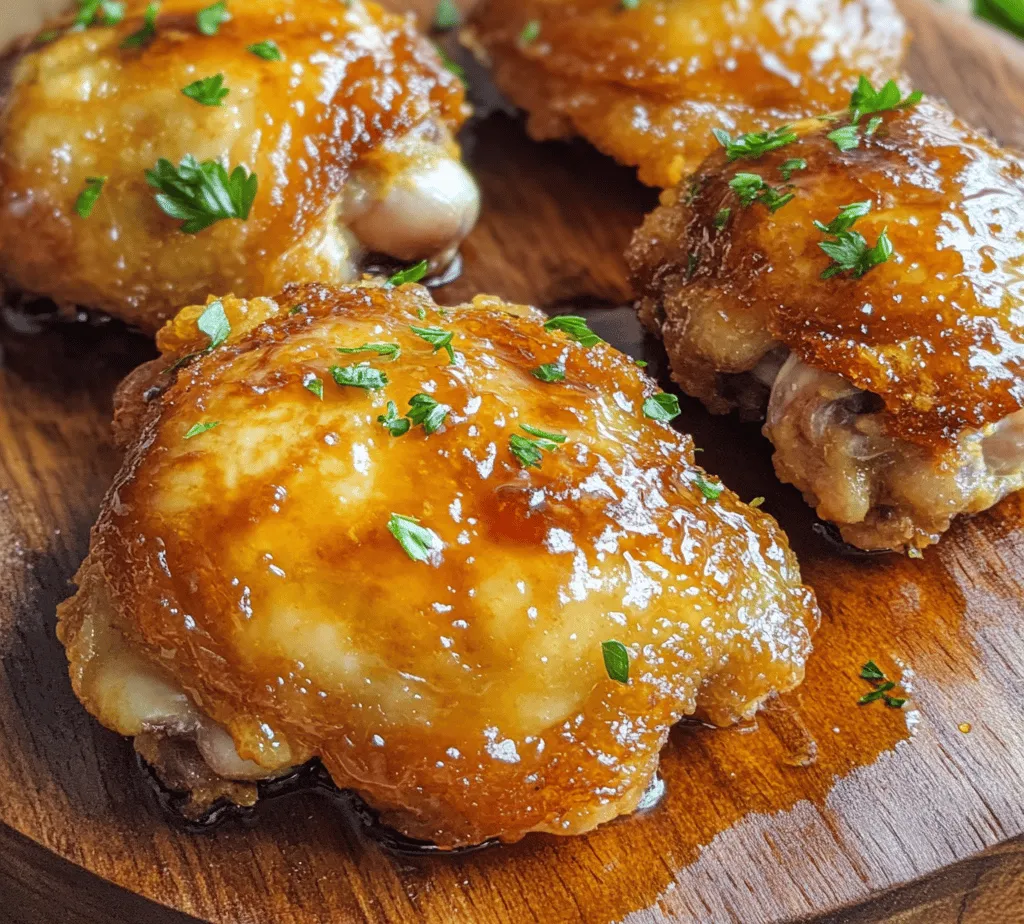
The chicken thighs are seasoned and marinated, allowing the flavors to penetrate the meat, ensuring that each bite is bursting with taste. The honey butter sauce is the star of the show, offering a sticky sweetness that beautifully contrasts with the savory seasoned flour coating. This delightful contrast is what makes Honey Butter Chicken a standout dish—it’s satisfying enough to serve as a main course, yet indulgent enough to make any meal feel special.
Why This Recipe Stands Out
What sets this Honey Butter Chicken recipe apart from others is its emphasis on quality ingredients and the techniques used to prepare each component. Using chicken thighs, which are juicier and more flavorful than breasts, ensures that the dish remains tender and succulent. The marination process with buttermilk not only enhances the chicken’s flavor but also contributes to its tenderness, making every bite melt in your mouth.
Additionally, the seasoned flour coating adds a delectable crunch that perfectly complements the honey butter sauce. This recipe focuses on achieving the ideal balance of textures and flavors, making it not just a meal, but an experience that resonates with diners. Whether you’re cooking for a family dinner or hosting friends, this Honey Butter Chicken recipe is sure to be a hit.
Ingredients Breakdown
Overview of Key Ingredients
To create the ultimate Honey Butter Chicken, you will need a selection of key ingredients that work in harmony to bring the dish to life. Here’s a breakdown of what you’ll need:
– Chicken thighs: The main protein, chosen for their flavor and juiciness.
– Buttermilk: Used for marinating, it tenderizes the chicken and infuses it with flavor.
– Seasoned flour: A mixture of flour and spices that coats the chicken, providing a crispy texture.
– Honey: The star of the sauce, adding sweetness and a beautiful glaze.
– Butter: Enriches the sauce, creating a creamy consistency.
– Soy sauce: Adds depth and umami to the honey butter sauce.
– Apple cider vinegar: Provides acidity and balance to the sweetness of the honey.
The Role of Chicken Thighs: Why They Are Ideal for This Recipe
Chicken thighs are the preferred choice for this Honey Butter Chicken recipe, and for good reason. Unlike chicken breasts, which can easily dry out during cooking, thighs have a higher fat content, resulting in a more tender and juicy final product. This richness allows the meat to absorb the flavors of the marinade and seasoning effectively, ensuring that every bite is packed with taste.
Additionally, chicken thighs are forgiving when it comes to cooking times. They can withstand a bit of overcooking without becoming tough, making them an excellent option for home cooks who may not have perfected their frying technique yet. Their intrinsic flavor also pairs beautifully with the honey butter sauce, enhancing the overall experience of the dish.
The Importance of Seasoned Flour: Enhancing Flavor and Texture
The seasoned flour used for coating the chicken is crucial for developing the dish’s signature crispy exterior. This mixture typically consists of all-purpose flour combined with various spices, such as garlic powder, onion powder, paprika, salt, and pepper. Each of these ingredients contributes to the overall flavor profile of the dish, adding layers of taste that complement the sweetness of the honey.
Coating the chicken in seasoned flour before frying creates a barrier that locks in moisture while also providing texture. When fried, the flour mixture transforms into a crunchy, golden crust that contrasts beautifully with the tender chicken inside. This textural element is key to enjoying Honey Butter Chicken, as it elevates the dish from ordinary to extraordinary.
The Sweet Addition: Honey as a Flavor Enhancer
Honey is the star ingredient in this recipe, providing the distinct sweetness that defines Honey Butter Chicken. Not only does it contribute to the dish’s flavor, but it also serves as a natural thickening agent when combined with butter. The result is a glossy glaze that coats the chicken and enhances its appearance and taste.
In addition to its sweetness, honey contains various beneficial properties, including antioxidants and anti-inflammatory compounds. Using honey as a flavor enhancer allows for a more wholesome dish compared to refined sugars, making it a great choice for those looking to indulge without compromising on health.
The Creamy Component: Buttermilk and Its Impact on Tenderness
Buttermilk plays a critical role in the preparation of Honey Butter Chicken, particularly in the marination process. The acidity of buttermilk helps to break down the proteins in the chicken, resulting in a more tender and juicy final product. This step is crucial, especially for chicken thighs, as it allows the meat to retain moisture during cooking.
Marinating the chicken in buttermilk also infuses it with flavor, enhancing the overall taste of the dish. The creaminess of buttermilk works in tandem with the honey butter sauce, creating a rich and satisfying experience that is sure to please anyone at the dinner table.
Soy Sauce and Apple Cider Vinegar: Adding Depth to the Sauce
The combination of soy sauce and apple cider vinegar is what gives the honey butter sauce its depth and complexity. Soy sauce introduces umami notes that balance the sweetness of the honey, while apple cider vinegar adds a touch of acidity that brightens the flavors. This balance is essential for achieving a well-rounded sauce that enhances the chicken without overpowering it.
When these ingredients are combined with butter and honey, they create a luscious sauce that clings beautifully to the crispy chicken, making each bite a perfect blend of sweet and savory. This dynamic flavor partnership is a hallmark of Honey Butter Chicken, setting it apart from other fried chicken dishes.
Suggested Substitutions for Dietary Needs
While this Honey Butter Chicken recipe is designed to be delicious and satisfying, it can also be adapted to accommodate various dietary needs. Here are some suggestions for substitutions:
– Gluten-Free Options: For those with gluten sensitivities, you can replace all-purpose flour with a gluten-free flour blend. Ensure that the seasoned elements, such as baking powder and spices, are also gluten-free.
– Dairy-Free Alternatives: If you’re avoiding dairy, consider using almond milk or soy milk in place of buttermilk. You can create a dairy-free buttermilk by mixing one cup of almond or soy milk with one tablespoon of apple cider vinegar and letting it sit for five minutes. For the butter component of the sauce, consider using a dairy-free butter substitute.
These substitutions allow you to enjoy the flavors of Honey Butter Chicken without compromising on dietary preferences, making this dish inclusive for all.
Preparation Steps
Preparing the Chicken: Essential Tips for Coating
To achieve the perfect Honey Butter Chicken, preparation is key. Start by selecting high-quality chicken thighs, as they will be the foundation of your dish. Trim any excess fat and pat the chicken dry with paper towels to ensure that the coating adheres properly.
Once the chicken is prepped, it’s time to marinate it in buttermilk. This step not only enhances the flavor but also ensures that the chicken stays moist during frying. Allow the chicken to marinate for at least one hour, or ideally overnight in the refrigerator, for maximum tenderness.
How to Properly Dredge Chicken for Maximum Crispiness
Once the chicken has marinated, the next step is to dredge it in the seasoned flour mixture. For optimal crispiness, follow these steps:
1. Prepare the dredging station: Set up a workstation with three shallow bowls—one for the marinated chicken, one for the seasoned flour, and one for the cooked chicken.
2. Coat the chicken: Remove each piece of chicken from the buttermilk, allowing any excess to drip off. Dredge the chicken in the seasoned flour, ensuring that each piece is thoroughly coated. Press the flour onto the chicken to create a thicker crust, which will yield a crunchier texture once fried.
3. Rest before frying: After coating, let the chicken rest for a few minutes. This allows the flour to adhere better and helps create a more substantial crust when frying.
The Importance of Buttermilk in the Marinating Process
As mentioned earlier, the buttermilk marinade is essential for tenderizing the chicken. The acidity in buttermilk breaks down the proteins, resulting in a softer texture that retains moisture during cooking. This step is crucial for achieving juicy, flavorful chicken thighs.
To enhance the marinade, you can add spices such as garlic powder, onion powder, or paprika to infuse even more flavor into the chicken. Allowing the chicken to marinate for several hours or overnight will yield the best results, as the flavors have time to penetrate the meat thoroughly.
Frying the Chicken: Achieving Perfectly Golden Brown Thighs
Frying the chicken is where the magic happens. To achieve perfectly golden brown thighs, follow these steps:
1. Heat the oil: Choose a neutral oil with a high smoke point, such as vegetable oil or canola oil. Fill a deep skillet or heavy-bottomed pot with about 2 inches of oil and heat it to 350°F (175°C). You can use a thermometer to ensure the oil reaches the correct temperature; this is essential for achieving crispy chicken.
2. Fry in batches: Carefully add the dredged chicken thighs to the hot oil, being careful not to overcrowd the pan. Fry in batches if necessary, allowing enough space for the chicken to cook evenly.
3. Monitor cooking time: Fry the chicken for about 7-10 minutes per side, or until it reaches an internal temperature of 165°F (75°C) and is golden brown. Use a slotted spoon to flip the chicken gently, ensuring an even cook.
4. Drain excess oil: Once cooked, transfer the chicken to a wire rack or paper towel-lined plate to drain any excess oil. This step is vital for retaining the crispiness of the coating.
The Best Oil for Frying: Types and Temperature Considerations
When it comes to frying Honey Butter Chicken, the type of oil you use can significantly impact the final result. Here are a few excellent options:
– Vegetable oil: A common choice for frying due to its high smoke point and neutral flavor, making it ideal for fried chicken.
– Canola oil: Another great option with a high smoke point, canola oil is light and won’t impart any strong flavors to the chicken.
– Peanut oil: Known for its excellent frying capabilities, peanut oil can enhance the flavor of fried foods, making it a popular choice in many Asian cuisines.
Regardless of the oil you choose, always monitor the temperature closely. Maintaining the right frying temperature is crucial for achieving that coveted crispy exterior while ensuring the chicken is cooked through. If the oil is too hot, the exterior will burn before the inside cooks; if it’s too cool, the chicken will absorb excess oil and become greasy.
By following these preparation steps and tips, you’ll be well on your way to creating a delicious batch of Honey Butter Chicken. As you delve deeper into this recipe, you will discover the joy of combining sweet and savory flavors, resulting in a dish that will surely become a favorite in your household. Stay tuned for the next part of this article, where we will dive into the preparation of the honey butter sauce and additional tips to elevate your cooking experience.
Avoiding Common Mistakes When Frying Chicken
Frying chicken to perfection can be challenging, and several common mistakes can lead to disappointing results. Here are some pitfalls to watch out for:
1. Not Patting the Chicken Dry: Always ensure that the chicken pieces are thoroughly dried with paper towels before seasoning and coating. Excess moisture can cause the breading to become soggy and can lead to oil splatter during frying.
2. Using Cold Oil: Heating oil to the proper temperature is crucial for achieving a crispy exterior. If the oil is not hot enough, the chicken will absorb too much oil, resulting in a greasy texture. Use a thermometer to check that the oil reaches 350°F (175°C) before adding the chicken.
3. Crowding the Pan: Frying too many pieces of chicken at once can lower the oil temperature drastically, leading to uneven cooking and soggy breading. Fry in batches to maintain a consistent temperature and ensure each piece has enough space.
4. Skipping the Resting Period: After frying, allow the chicken to rest on a wire rack rather than placing it directly on a plate. This prevents steam from accumulating and keeps the breading crispy.
Creating the Honey Butter Sauce: A Step-by-Step Guide
The honey butter sauce is the star of this dish, adding richness and sweetness that perfectly complements the savory fried chicken. Here’s how to create it step-by-step:
1. Gather Your Ingredients: You will need unsalted butter, honey, garlic powder, salt, and a pinch of cayenne pepper for an extra kick.
2. Melt the Butter: In a small saucepan over medium heat, melt ½ cup of unsalted butter. Stir occasionally to ensure it doesn’t burn.
3. Add Honey: Once the butter is fully melted, add ½ cup of honey. Stir continuously until the mixture is well combined.
4. Season the Sauce: Add 1 teaspoon of garlic powder, a pinch of cayenne pepper, and salt to taste. Mix well and let it simmer for about 2 minutes, allowing the flavors to meld together.
5. Adjust Consistency: If you prefer a thicker sauce, allow it to simmer slightly longer until it reaches your desired consistency. If it becomes too thick, simply add a tablespoon of water to thin it out.
The Right Temperature for Sauce Preparation
When preparing the honey butter sauce, maintaining the right temperature is critical. Cooking over medium heat allows the butter to melt without burning, while simmering helps to combine the flavors without losing the sauce’s creamy texture. If you notice the sauce starting to bubble too vigorously, reduce the heat to prevent burning.
Techniques for Achieving the Perfect Consistency
For the ideal honey butter sauce, consider the following techniques:
– Constant Stirring: Stirring continuously while combining the ingredients helps to create an emulsion, ensuring that the honey and butter meld smoothly without separating.
– Simmer, Don’t Boil: Allow the sauce to simmer gently rather than boiling. Boiling can cause the butter to separate and the sauce to become oily.
– Taste and Adjust: Always taste your sauce before serving. Adjust the sweetness with additional honey or add more salt based on your preference.
Combining the Chicken and Sauce: Ensuring Even Coating
Once your chicken is fried and the honey butter sauce is ready, it’s time to combine the two. Follow these steps for an even coating:
1. Transfer Fried Chicken: Place the fried chicken pieces in a large mixing bowl.
2. Drizzle the Sauce: Pour the warm honey butter sauce over the chicken, ensuring all pieces are coated.
3. Toss Gently: Using tongs or a spatula, gently toss the chicken to ensure each piece is evenly coated with the sauce. Be careful not to break the crispy coating.
4. Let It Rest: Allow the coated chicken to rest for a few minutes before serving. This gives the sauce a chance to seep into the breading, enhancing the flavor.
Tips for Retaining Crispiness After Coating
After coating your chicken with the honey butter sauce, it’s essential to maintain that crispy texture. Here are some tips:
1. Serve Immediately: For the best texture, serve the chicken immediately after coating it with the sauce. The longer it sits, the more the breading will soften.
2. Use a Wire Rack: After coating, place the chicken on a wire rack instead of directly on a plate. This allows air circulation around the chicken, preventing moisture buildup.
3. Avoid Covering: If possible, avoid covering the chicken with foil or a lid, as this will trap steam and soften the breading.
Serving Suggestions
To complement the rich flavors of honey butter chicken, consider the following side dishes:
Ideal Side Dishes to Pair with Honey Butter Chicken
– Classic Options:
– Mashed Potatoes: Creamy mashed potatoes absorb the delicious sauce and provide a comforting side.
– Green Beans: Steamed or sautéed green beans add a fresh, crisp contrast to the rich chicken.
– Creative Pairings:
– Coleslaw: The crunchy, tangy flavor of coleslaw balances the sweetness of the chicken, creating an enjoyable texture contrast.
– Cornbread: Sweet cornbread pairs beautifully with honey butter chicken, offering a delightful combination of flavors.
Presentation Tips for a Stunning Serving Platter
For an impressive presentation, consider these tips:
– Layering: Arrange the chicken pieces in a single layer on a large serving platter, allowing for visual appeal and easy access.
– Color Contrast: Use colorful side dishes, such as vibrant green beans or bright coleslaw, to create a visually appealing plate.
– Garnish: Fresh parsley can add a pop of color and freshness. Sprinkle chopped parsley over the chicken just before serving for an inviting look.
Storing and Reheating Honey Butter Chicken
If you have any leftovers (which is unlikely, given how delicious this dish is), follow these best practices for storage and reheating:
Best Practices for Storing Leftovers
– Cool Down First: Allow the honey butter chicken to cool to room temperature before storing it to prevent condensation in the container.
– Use Airtight Containers: Store the chicken in airtight containers to keep it fresh and prevent moisture loss.
How to Keep the Chicken Fresh
– Refrigeration: Store leftover chicken in the refrigerator for up to 3 days. For longer storage, consider freezing the chicken.
– Freezing: If freezing, wrap each piece in plastic wrap and place them in a freezer-safe bag, ensuring as much air is removed as possible.
Reheating Techniques to Maintain Flavor and Texture
For optimal flavor and texture, reheating methods vary:
– Oven: Preheat your oven to 375°F (190°C). Place the chicken on a baking sheet and cover it loosely with aluminum foil. Heat for about 15-20 minutes or until warmed through. This method helps retain the crispiness.
– Microwave: While the microwave is convenient, it can result in sogginess. If using the microwave, place the chicken on a microwave-safe plate, cover with a damp paper towel, and reheat in 30-second intervals until heated through.
Nutritional Information
Understanding the nutritional profile of honey butter chicken can help you enjoy this dish as part of a balanced diet.
A Nutritional Breakdown of Honey Butter Chicken
– Serving Size: One serving (about 1 piece of chicken with sauce) typically contains around 400-500 calories, depending on the size of the chicken and the amount of sauce used.
– Key Nutrients Provided by the Ingredients:
– Protein: Chicken is an excellent source of protein, essential for muscle repair and growth.
– Fats: The unsalted butter provides healthy fats, while honey adds natural sugars for energy.
– Vitamins and Minerals: Garlic powder and parsley add trace vitamins and minerals, enhancing the overall nutritional profile.
Conclusion
Honey butter chicken is a delightful dish that combines savory flavors with a touch of sweetness, making it a comforting choice for any meal. Its versatility allows it to be paired with various sides, and it shines as a centerpiece at gatherings or family dinners. Whether enjoyed fresh or as leftovers, this recipe promises satisfaction and flavor that will please everyone at the table. We encourage you to try this recipe for yourself, as the combination of crispy, golden chicken and luscious honey butter sauce is sure to become a beloved favorite in your home.