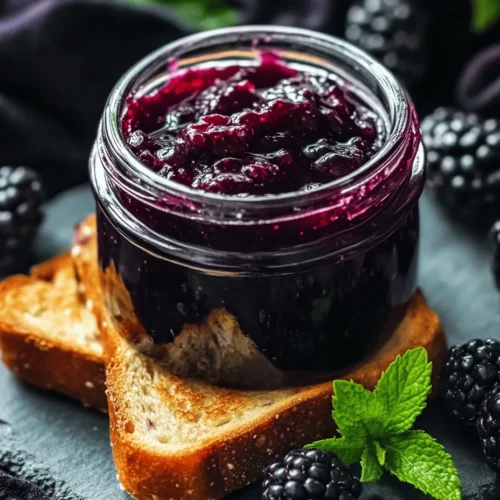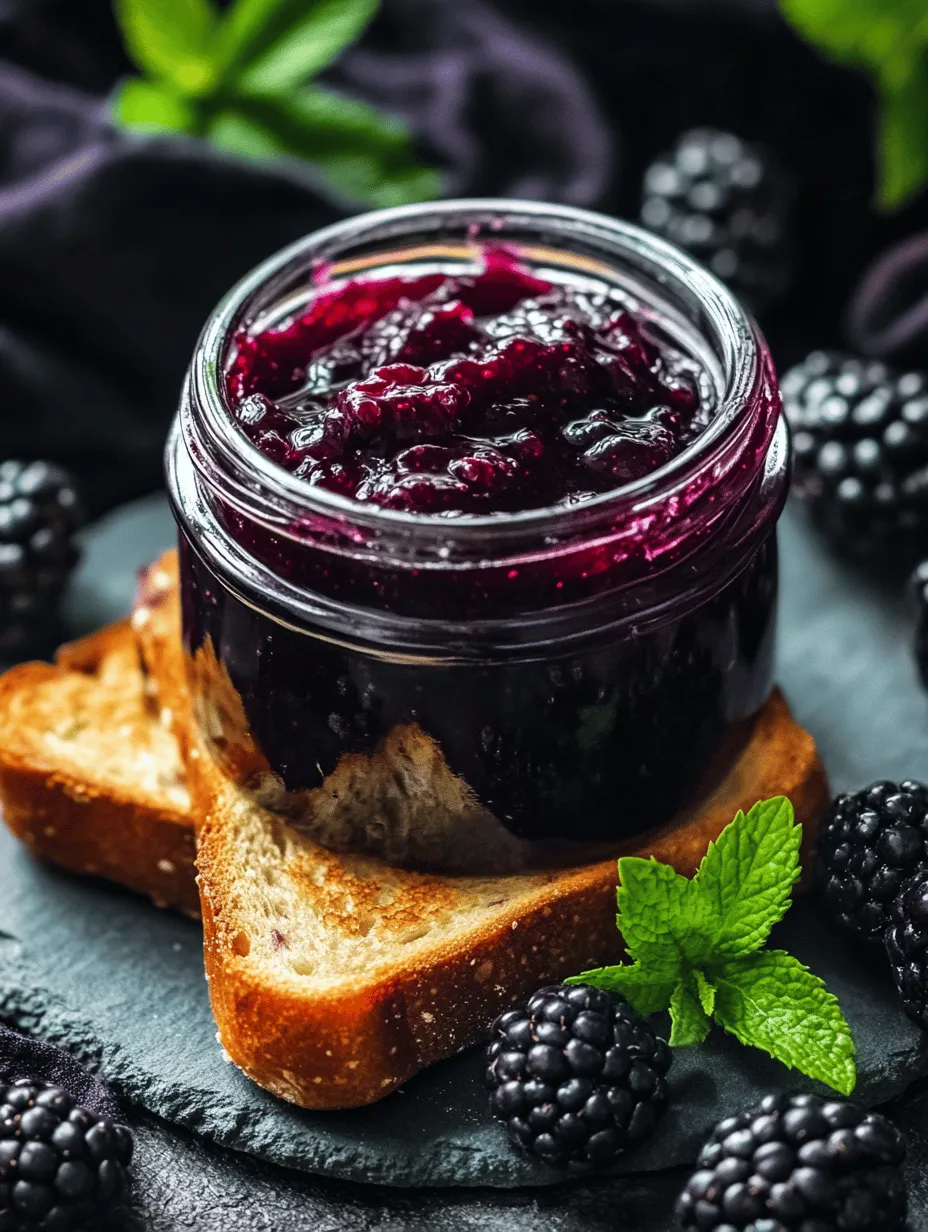
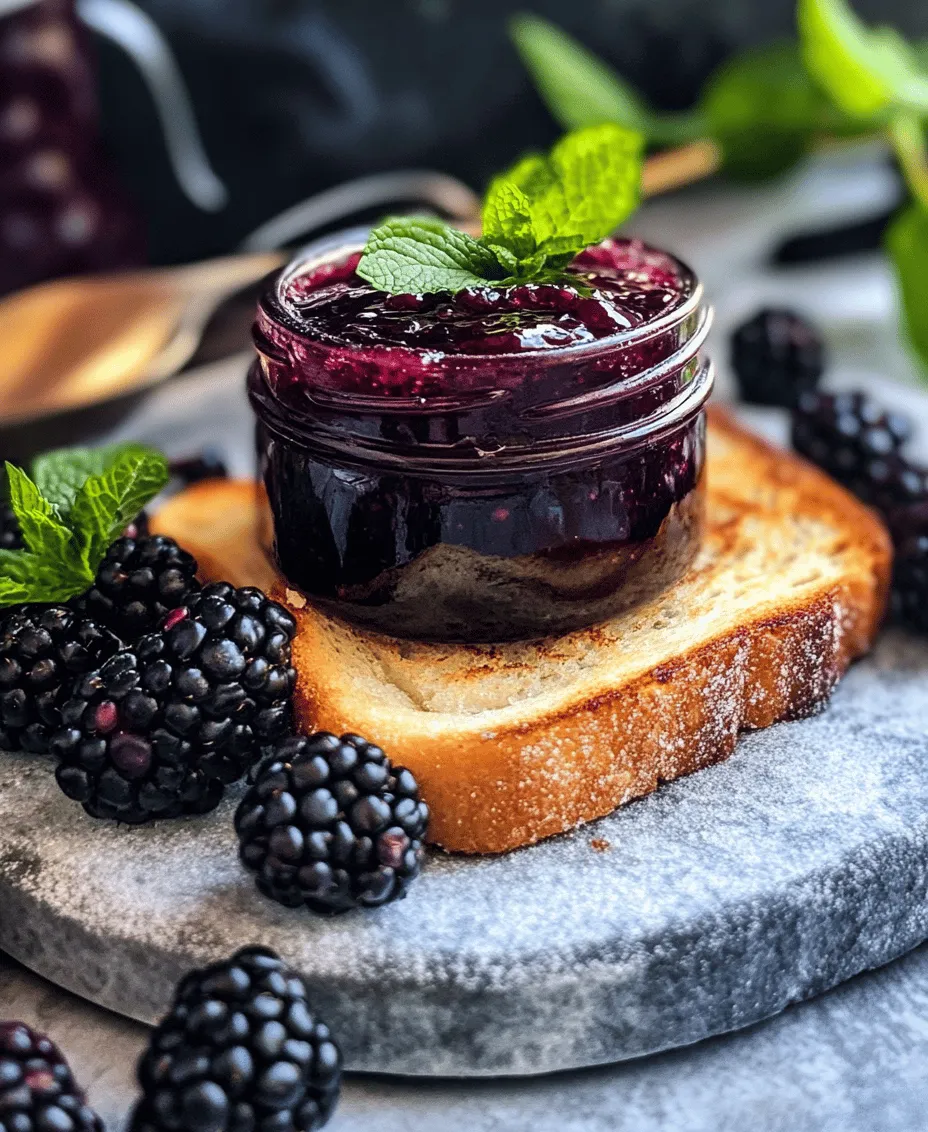
The allure of homemade jam is undeniable—its rich flavors and vibrant colors can elevate any dish. There’s something truly special about spreading a spoonful of ruby-red jam on a warm slice of toast or dolloping it over vanilla ice cream. Among the myriad of fruit preserves, Sweet & Tangy Blackberry Bliss Jam stands out for its perfect balance of sweetness and tartness. This delightful jam is not only a delicious addition to your breakfast table but also a versatile ingredient that can enhance desserts, cheeseboards, and snacks.
Blackberries, the star ingredient in this recipe, are known for their deep, luscious flavor and numerous health benefits. Making your own jam allows you to control the sweetness and enjoy the peak freshness of seasonal blackberries while avoiding the preservatives and additives often found in store-bought varieties. In this article, we will dive into the details of making this exquisite jam, exploring its ingredients, step-by-step preparation, and the joy it brings to your culinary repertoire.
Understanding the Ingredients
Creating the perfect Sweet & Tangy Blackberry Bliss Jam starts with understanding the essential ingredients that contribute to its unique flavor and texture.
Exploring Fresh Blackberries
Fresh blackberries are the backbone of this recipe, providing a sweet yet tangy flavor that makes the jam irresistible. Not only are they delicious, but they also come packed with nutritional benefits. Blackberries are a fantastic source of vitamins C and K, fiber, and antioxidants, making them a healthy choice for a fruit spread.
Nutritional Benefits of Blackberries
– Rich in Antioxidants: Blackberries are loaded with antioxidants that help fight free radicals in the body, potentially reducing the risk of chronic diseases.
– High in Fiber: With about 7g of fiber per cup, blackberries can promote digestive health and keep you feeling full longer.
– Vitamin C Powerhouse: Just one cup of blackberries provides a significant amount of vitamin C, essential for a healthy immune system and skin health.
How to Select the Best Blackberries
When selecting blackberries for your jam, look for plump, firm fruits with a deep black color. Avoid berries that are soft or have any signs of mold. If possible, purchase organic blackberries to ensure you’re getting the freshest and most flavorful fruit without pesticides. If you can’t find fresh blackberries, you can also use frozen ones, but make sure to thaw and drain them before use.
The Role of Lemon Juice
In addition to blackberries, lemon juice plays a crucial role in the jam-making process.
Importance of Acidity in Jam-Making
Lemon juice adds acidity to the jam, which is essential for preserving the fruit and enhancing its flavor. The acidic environment helps to balance the sweetness of the sugar and contributes to the overall brightness of the jam.
Flavor Enhancement and Preservation Properties
The acidity from lemon juice not only enhances the blackberry flavor but also acts as a natural preservative, helping to extend the shelf life of your homemade jam. Additionally, the citric acid in lemon juice can aid in the gelling process when combined with sugar and pectin.
Granulated Sugar: Sweetening the Jam
Sugar is another key ingredient that not only sweetens the jam but also plays a vital role in its preservation.
Understanding Sugar’s Role in Preserving
When making jam, sugar helps to extract juice from the fruit through a process called maceration. This process is crucial for achieving the right consistency and flavor. The sugar also inhibits the growth of microorganisms, which helps to keep your jam safe and shelf-stable.
Alternatives for Healthier Options
While granulated sugar is the traditional sweetener used in jam-making, you can experiment with alternatives like honey, maple syrup, or agave syrup if you’re seeking a healthier option. Keep in mind that these alternatives may alter the final flavor and consistency of the jam, so it’s best to follow a tested recipe if you’re making substitutions.
Pectin: The Secret to a Perfect Set
Pectin is the unsung hero of jam-making, providing the necessary structure and thickness to your finished product.
What is Pectin and How It Works
Pectin is a natural carbohydrate found in the cell walls of fruits. When heated with sugar in the presence of acid, pectin forms a gel-like consistency, allowing the jam to set. Different fruits have varying levels of natural pectin; blackberries have a moderate amount, which is why additional pectin is often added to ensure the jam sets properly.
Differences Between Low-Sugar and No-Sugar Pectin
When selecting pectin, you’ll come across low-sugar and no-sugar varieties. Low-sugar pectin is ideal for recipes that use less sugar while still achieving a good set, whereas no-sugar pectin is designed for those who want to eliminate sugar altogether. Keep in mind that using less sugar can affect the flavor and shelf life of your jam, so adjustments may be necessary.
Enhancing Flavor with Vanilla and Salt
To elevate your Blackberry Bliss Jam even further, consider adding a few optional flavor enhancers.
The Optional Addition of Vanilla Extract
A splash of vanilla extract can add a wonderful depth of flavor to your jam. It complements the natural sweetness of the blackberries and adds a sophisticated note that pairs beautifully with the tartness.
How Salt Balances Sweetness
A pinch of salt may seem counterintuitive in a sweet jam, but it can actually enhance the overall flavor profile. Salt helps to balance the sweetness and magnify the fruit’s natural flavors, making each spoonful more enjoyable.
Preparing Your Kitchen for Jam-Making
Before diving into the jam-making process, it’s crucial to prepare your kitchen and gather all necessary tools.
Essential Kitchen Tools
To make Sweet & Tangy Blackberry Bliss Jam, you’ll need the following utensils:
– Mixing Bowls: For combining ingredients and mashing the fruit.
– Saucepan: A heavy-bottomed saucepan is ideal for cooking the jam mixture evenly.
– Masher: A potato masher or fork to break down the blackberries to your desired texture.
– Jars: Sterilized glass jars with airtight lids for storing the finished jam.
– Ladle and Funnel: Helps in transferring the jam into jars without spills.
Importance of Sterilization in Jam-Making
Sterilizing your jars is a crucial step in the jam-making process. Properly sterilized jars prevent the growth of bacteria and ensure a longer shelf life for your jam. You can sterilize jars by boiling them in water for 10 minutes or running them through a dishwasher cycle on high heat.
Setting Up Your Cooking Space
An organized cooking space is essential for a smooth jam-making experience.
Tips for an Organized and Efficient Workspace
– Clear Your Counter: Remove any unnecessary items from your workspace to give yourself ample room for preparing ingredients and cooking.
– Gather Ingredients: Measure out all your ingredients beforehand and have them within reach. This will save time and make the process more efficient.
– Prepare for Clean-Up: Have a cleaning cloth or paper towels handy for any spills or messes that may occur during the process.
Safety Considerations When Handling Hot Liquids
When cooking jam, be cautious of hot liquids and steam. Use oven mitts when handling pots and pans, and ensure that your workspace is free of clutter to prevent accidents. It’s also advisable to keep children and pets away from the cooking area until the jam has cooled.
Step-by-Step Guide to Making Sweet & Tangy Blackberry Bliss Jam
Now that you have your ingredients prepared and kitchen set up, it’s time to embark on the delightful journey of making your Sweet & Tangy Blackberry Bliss Jam.
Mashing the Blackberries
The first step in creating your jam is mashing the blackberries to release their juices.
Techniques for Achieving the Desired Texture
Using a potato masher or a fork, gently mash the blackberries in a mixing bowl. Aim for a chunky consistency, preserving some whole fruit pieces for texture. This will give your jam a rustic feel, enhancing its homemade charm.
The Importance of Preserving Some Fruit Pieces
While it might be tempting to mash the blackberries into a smooth puree, preserving some fruit pieces adds character and helps maintain the natural flavor of the blackberries. A mix of textures will create a more satisfying jam that feels homemade.
Combining Ingredients for Optimal Flavor
Once the blackberries are mashed, it’s time to combine them with the other ingredients.
Tips for Mixing and Ensuring Even Distribution
In a large saucepan, combine the mashed blackberries with granulated sugar, lemon juice, and pectin. Stir well to ensure that all ingredients are evenly distributed. This will help the pectin activate properly during cooking, leading to a well-set jam.
The Science Behind Maceration
Before cooking, allow the mixture to sit for about 15 minutes. This process, known as maceration, enables the sugar to draw out the juices from the blackberries, resulting in a more flavorful jam. The sugar will dissolve, and the blackberries will soften, creating a luscious mixture ready for cooking.
Cooking the Mixture to Perfection
The final step in making your Blackberry Bliss Jam is to cook the mixture to achieve the perfect consistency.
Bringing the Mixture to a Boil
Place the saucepan over medium heat and bring the mixture to a rolling boil, stirring frequently to prevent sticking. Once boiling, continue to cook for about 10-15 minutes, or until the jam reaches the desired thickness. You can test its consistency by placing a spoonful on a chilled plate—if it holds its shape and doesn’t run, it’s ready for canning.
Skimming Foam from the Surface
As the jam cooks, you may notice some foam forming on the surface. This is normal and can be skimmed off with a spoon to improve the appearance of your finished jam. Removing excess foam will ensure a more appealing presentation when you fill your jars.
Now that you have a detailed understanding of the ingredients, preparation, and initial steps in making Sweet & Tangy Blackberry Bliss Jam, you are well on your way to creating a delightful homemade treat. Continue to the next section for instructions on finishing your jam and proper canning techniques to ensure longevity.
Importance of Stirring and Monitoring Temperature
When making your Sweet & Tangy Blackberry Bliss Jam, consistent stirring and careful temperature monitoring are essential for the best results. As the fruit mixture heats, it’s vital to stir regularly to prevent it from sticking to the bottom of the pot and burning. This will also ensure that the sugar dissolves evenly into the mixture, promoting a smooth texture in the final product.
Using a candy thermometer or a digital kitchen thermometer can help you accurately gauge the temperature of your jam. Aim for a temperature of about 220°F (104°C), which is the ideal point for achieving the gel consistency that characterizes high-quality jams. Monitoring the temperature will not only help in achieving the right texture but also prevents overcooking, which can lead to a darker color and an undesirable flavor.
Visual Cues for Determining Doneness
In addition to temperature checks, visual cues play a crucial role in determining whether your jam is ready. You’ll know your jam is close to done when it begins to thicken significantly, and bubbles start to become larger and slower to pop. Another reliable method is the plate test: place a spoonful of jam on a cold plate, let it sit for a minute, and then run your finger through it. If the jam holds its shape and the line remains clear, it’s ready for jarring. If not, continue to cook for a few more minutes and test again.
Testing for Consistency
Testing the consistency of your jam is essential to ensure that it has the right thickness and texture. As mentioned, the plate test is one of the simplest and most effective methods. Additionally, you can use the spoon test: dip a spoon into the jam and let it drip. If it forms a sheet rather than individual drops, it’s likely ready.
If your jam is still too runny after following these tests, you may need to cook it a little longer to evaporate additional moisture. If you’ve reached the desired temperature and the jam is still not thickening, you may consider adding a thickening agent, such as pectin, which can boost the gelling process.
What to Do if the Jam is Too Runny
If you’ve followed all the steps and your jam still turns out too runny, don’t fret. You can return it to the pot, bring it back to a boil, and add a small amount of additional pectin, cooking it for a few more minutes until the desired consistency is achieved. Keep in mind that some fruits naturally have lower pectin levels, so adjusting your method based on the fruit used can be helpful for future batches.
Incorporating Optional Ingredients
Adding optional ingredients can elevate your jam’s flavor profile and make it uniquely yours.
When and How to Add Vanilla Extract
Vanilla extract can be a wonderful complement to the tartness of blackberries. To incorporate vanilla, add about one teaspoon of pure vanilla extract to the mixture just as it begins to thicken. This allows the flavor to infuse without being cooked out.
Alternative Flavoring Options
Consider experimenting with other flavoring options as well. For a warm spice note, you could add a pinch of cinnamon or cardamom during the cooking process. Fresh herbs like mint or basil can also be added for a fresh twist. Simply toss in a few leaves during the cooking stage, then remove them before jarring for a subtle infusion of herbal flavor.
Jarring the Jam
Once your jam has reached the desired consistency and flavor, it’s time to jar it properly.
Best Practices for Filling Jars
Before filling your jars, ensure they are clean and sterilized. You can do this by placing them in boiling water for 10 minutes or running them through a dishwasher cycle. When filling the jars, use a ladle or funnel to avoid spills, and fill each jar to within 1/4 inch of the top. This headspace is crucial for proper sealing.
Importance of Headspace and Sealing
Maintaining the appropriate headspace allows for the expansion of the jam as it cools and ensures a proper seal when the lid is applied. After filling, wipe the rims of the jars with a clean cloth to remove any residue before placing the lids on securely.
Cooling and Storing Your Jam
After sealing your jars, it’s important to cool them properly to create a vacuum seal.
Detailed Cooling Process
Let the jars sit at room temperature for 12 to 24 hours so that they can cool down and the lids can seal effectively. You’ll know they are properly sealed when you press down in the center of the lid, and it doesn’t pop back up. If it does pop, that particular jar did not seal correctly, and you can either reprocess it or refrigerate it for immediate use.
Long-Term Storage Methods for Homemade Jam
Store your sealed jars in a cool, dark place, such as a pantry or cellar, where they can last for up to a year. Once opened, store the jam in the refrigerator, where it will remain fresh for several weeks. Freezing is also an option if you want to extend the shelf life further; just ensure to leave adequate headspace if using glass containers.
Serving Suggestions and Culinary Uses
The Sweet & Tangy Blackberry Bliss Jam is incredibly versatile, making it perfect for a variety of culinary applications.
Breakfast Ideas
Enjoy the jam as a delightful spread on warm toast, pancakes, or waffles. It adds a burst of flavor that transforms these breakfast staples into something special. Additionally, incorporating jam into yogurt parfaits with layers of granola and fresh fruit creates a deliciously satisfying breakfast or snack option.
Dessert Enhancements
For those with a sweet tooth, this jam can be used in a multitude of desserts. Swirl it into cake batters for a fruity surprise or use it as a filling for pastries and tarts. It also pairs wonderfully with ice cream, either as a topping or blended into milkshakes for a refreshing treat.
Savory Pairings
Jam isn’t just for sweet dishes; it can also enhance savory flavors. Try serving it with a cheese platter, pairing it with creamy cheeses like brie or tangy goat cheese for an elegant appetizer. It also makes an excellent glaze for meats, such as chicken or pork, providing a sweet and tangy contrast that elevates the main dish.
Nutritional Information and Health Benefits
Understanding the nutritional profile of your homemade jam can be beneficial, especially when considering health-conscious choices.
Caloric Breakdown
A typical serving of homemade blackberry jam (about one tablespoon) contains approximately 50 calories, significantly lower than many store-bought options that often contain additional preservatives and high fructose corn syrup. By making your own, you control the sugar content, allowing for a healthier spread.
Health Benefits of Blackberries
Blackberries are nutritional powerhouses, rich in antioxidants, vitamins C and K, and dietary fiber. These nutrients are beneficial for heart health, aiding digestion, and boosting overall immune function. Homemade jam retains more of these nutrients compared to commercially produced varieties, which can be heavily processed.
Conclusion
Crafting your own Sweet & Tangy Blackberry Bliss Jam is a rewarding culinary experience that brings the essence of summer to your pantry. The process not only cultivates creativity in the kitchen but also promotes a healthier lifestyle by using fresh ingredients and controlling sugar content. Whether enjoyed on a slice of bread or as part of a decadent dessert, this jam is sure to be a cherished staple in your home for years to come. By following these steps and suggestions, you can ensure that each jar of jam captures the delightful flavor of blackberries, ready to be enjoyed in countless delicious ways.